


Hey folks on the Barndominium Builders Forum,
Ryan here from Oldwayon (you might know me from my X posts @oldwayson about our ongoing build). We've been hustling on our barndominium project in the US heartland, and one of the latest wins was outfitting the new bathroom on the lean-to south side. This space is our master bath in the two-bed, two-bath living quarters extension off the main structure—great for privacy but it gets chilly in the winters since it's not fully insulated yet (we're still finishing electrical and insulation). After some research, we landed on the GiveBest Wall Heater for Bathroom (1500W model PWM320EW), and man, it's been a game-changer. Thought I'd share our experience, including the unboxing and install from the video I just posted, in case anyone's tackling similar setups.
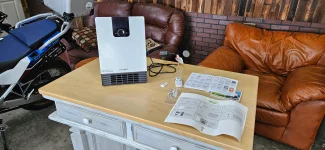
We needed something compact, safe for a humid bathroom environment, and efficient without cranking our electric bill. This GiveBest unit ticked all the boxes:
Pros from our use and what I've seen in reviews:

Cons: Fan noise is noticeable but not bad on high; app can be finicky for some, but it worked fine for us. Remote batteries not included, so grab some AAAs.
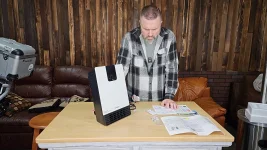
Installing this in the lean-to bathroom was straightforward—no electrician needed since it's plug-in (120V standard outlet, no extension cords—plug directly into a GFCI-protected wall outlet). We did it in under 30 minutes with basic tools, following the included instructions and template (which has a built-in level—nice touch!). Here's how we went about it, as shown in the video:
Pro tip from reviews and instructions: Mount it in a stable temperature area for best thermostat performance. Check amp draw (1500W pulls about 12.5 amps) if your wiring is older—fine for most circuits. Don't mount on uninsulated outer walls.
Two weeks in, and it's flawless. The lean-to side used to drop to 50°F on cold nights; now it stays cozy at 68-70°F without running constantly, keeping the space climate-controlled while we finish the room. Guests have commented on how warm and inviting the bathroom feels. No issues with humidity or safety—the ALCI plug and cooldown feature give peace of mind. We've been using the app to schedule it remotely, and the fan mode helps circulate air in summer. Overall, if you're building or renovating a barndo bathroom, this is a solid, affordable pick. Highly recommend—check out the video for the full unboxing and install demo!
If you've got questions or similar installs, hit me up. Pics in the video—stay tuned for more updates.
As an Amazon Associate, I earn from qualifying purchases.
Cheers,RyanOldwayon Barndominium Project
Ryan here from Oldwayon (you might know me from my X posts @oldwayson about our ongoing build). We've been hustling on our barndominium project in the US heartland, and one of the latest wins was outfitting the new bathroom on the lean-to south side. This space is our master bath in the two-bed, two-bath living quarters extension off the main structure—great for privacy but it gets chilly in the winters since it's not fully insulated yet (we're still finishing electrical and insulation). After some research, we landed on the GiveBest Wall Heater for Bathroom (1500W model PWM320EW), and man, it's been a game-changer. Thought I'd share our experience, including the unboxing and install from the video I just posted, in case anyone's tackling similar setups.
Why We Chose This Heater
We needed something compact, safe for a humid bathroom environment, and efficient without cranking our electric bill. This GiveBest unit ticked all the boxes:
- Fast Heating Power: 1500W PTC ceramic tech heats up a room quick—covers up to 200 sq ft easily, which is perfect for our 8x10 bathroom. It blasts out 5200 BTU and warms the space in minutes, no more stepping out of the shower into a freezer. Very quiet operation, even on high.
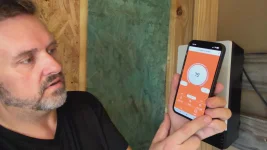
- Smart Features: Comes with a remote (needs AAA batteries, not included), touch screen controls on the unit, and Wi-Fi connectivity via the Smart Life app for scheduling and remote control from your phone. Adjustable thermostat (45-95°F), 3 heat modes (low/medium/high at 750W/1000W/1500W), ECO mode for energy savings, fan-only for summer or circulation, 24-hour timer, child lock in the app, and even backlight control to turn the screen off. We set it to kick on 15 minutes before morning routines—pure luxury. You can mute the beeps and turn Wi-Fi on/off easily.
- Bathroom-Specific Safety: ALCI (GFI) plug with reset/test button for wet areas, overheat shutoff, tip-over protection, and a dust cap on the power switch. ETL listed for peace of mind. Since it's wall-mounted, no floor clutter or trip hazards. When shutting off in heat mode, it runs a cooldown countdown to safely cool the element.
- Versatile Design: White finish blends right in, and it's slim (about 15" tall, lightweight under 10 lbs). Can be floor-standing with included feet, but we went wall-mount for space savings. QR code on the unit for quick app setup.
- Price and Ratings: Snagged it for around $60-70. It's got a solid 4.5-star average from hundreds of reviews—folks rave about the quick heat, ease of use, and app integration. One reviewer called it "efficient and easy to install," which sold us. GiveBest seems like a reliable company based on what we've seen.
Pros from our use and what I've seen in reviews:
- Super quiet fan and operation.
- Energy-efficient ECO mode keeps temps steady without spiking usage.
- Remote and app let you tweak from anywhere (app setup was straightforward—connect to Wi-Fi, add device, and you're good).
- Durable build; feels premium for the price, with nice packaging and protective prong covers during shipping.
Cons: Fan noise is noticeable but not bad on high; app can be finicky for some, but it worked fine for us. Remote batteries not included, so grab some AAAs.
Our Installation Process
Installing this in the lean-to bathroom was straightforward—no electrician needed since it's plug-in (120V standard outlet, no extension cords—plug directly into a GFCI-protected wall outlet). We did it in under 30 minutes with basic tools, following the included instructions and template (which has a built-in level—nice touch!). Here's how we went about it, as shown in the video:
- Prep the Spot: Chose a wall spot above the towel rack area, about 5 feet up for even heat distribution, away from direct water splash (opposite the shower), sunlight, drafty windows, or uninsulated exterior walls to avoid code issues and ensure accurate thermostat readings. Made sure it was near an outlet. Since the unit isn't wide enough to span 16" on-center studs, we cut and installed a couple of 2x6 blocks between the metal framing for solid support.
- Mount the Bracket: Used the template to mark holes (includes a level for straightness), drilled pilot holes into the 2x6s, and secured the bracket with the provided screws and drywall anchors. It's lightweight, so one person can handle it.
- Hang the Heater: Slid the unit onto the bracket—it clicks in securely. Plugged it into the ALCI cord (about 6 ft long) and into the wall. Tested for stability; no wobble.
- Setup and Test: Turned on the rear switch, paired the remote, connected to Wi-Fi via the Smart Life app (scanned the QR code, added the device named IPH04, entered network password—took seconds), set the thermostat to 72°F in ECO mode, and fired it up. Instant heat! We added a quick seal around the mount with caulk to keep moisture out. Pro tip: Keep the rear fan intake clear of dust for maintenance—vacuum it occasionally.
Pro tip from reviews and instructions: Mount it in a stable temperature area for best thermostat performance. Check amp draw (1500W pulls about 12.5 amps) if your wiring is older—fine for most circuits. Don't mount on uninsulated outer walls.
How It's Performing
Two weeks in, and it's flawless. The lean-to side used to drop to 50°F on cold nights; now it stays cozy at 68-70°F without running constantly, keeping the space climate-controlled while we finish the room. Guests have commented on how warm and inviting the bathroom feels. No issues with humidity or safety—the ALCI plug and cooldown feature give peace of mind. We've been using the app to schedule it remotely, and the fan mode helps circulate air in summer. Overall, if you're building or renovating a barndo bathroom, this is a solid, affordable pick. Highly recommend—check out the video for the full unboxing and install demo!
If you've got questions or similar installs, hit me up. Pics in the video—stay tuned for more updates.
As an Amazon Associate, I earn from qualifying purchases.
Cheers,RyanOldwayon Barndominium Project