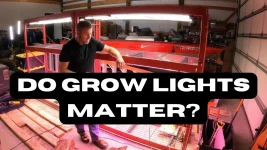
Transforming basic shelving racks into LED grow racks has been one of the most cost-effective and efficient ways I've started seeds indoors. Over the years, I’ve experimented with various grow light types—those bright purple-hued lights you often see, full-spectrum white shop lights from big-box stores, and even specialty LED grow lights bought online. Through trial and error, I’ve uncovered what works best and what’s worth skipping entirely.
Key Advantages of Shop Lights:
In the Victorian era, “Wardian cases,” the precursors to terrariums, allowed gardeners to grow and transport plants indoors. The cases trapped moisture and warmth, creating an ideal microclimate for seedlings. While these methods were effective, they highlight how much simpler grow lights have made the process.
If you have any tips or historical insights on seed starting, feel free to share them below. Let’s keep the conversation going!
Comparing Grow Lights: Shop Lights vs. Specialty Grow Lights
One key takeaway from my experiments is that full-spectrum shop lights often perform just as well as their pricier grow light counterparts. The term "full spectrum" means the light includes the necessary wavelengths for photosynthesis—red and blue—alongside other wavelengths that make it suitable for plant growth. If your shop lights are full spectrum, your seedlings won’t know the difference between those and specialty grow lights.Key Advantages of Shop Lights:
- Cost Savings: You can pick up shop lights for a fraction of the price of specialty grow lights. Over time, this can save hundreds of dollars, especially if you're scaling up for a larger operation.
- Heat Output: While LED grow lights are designed to minimize heat, shop lights can produce a bit of warmth, which helps in cooler indoor setups where seed trays benefit from some added heat.
- Durability: Many shop lights are built to last and handle more wear and tear, especially if you’re repurposing old fixtures.
- They may lack the sleek design and targeted features of specialty lights, such as daisy-chaining capabilities or built-in reflectors.
- They’re bulkier, which can be a challenge in tight setups.
Tips for Setting Up Grow Racks
Here are some insights I’ve gained when putting together grow racks:- Distance Matters: For seedlings, light intensity is crucial. Keep your lights no more than 2-3 inches above the top of your plants to ensure they get enough light and don’t grow leggy. Using adjustable shelving or stacking trays can help maintain this proximity.
- Daisy-Chaining Lights: If you’re using lights with this feature, it’s a game-changer for reducing wire clutter. However, ensure your total wattage doesn’t exceed the daisy chain’s capacity.
- Maximize Reflectivity: Line the sides of your shelves with aluminum foil or white foam boards to reflect light back onto the plants. This ensures no light goes to waste.
- Use Quality Zip Ties: Strong, durable zip ties make securing lights quick and hassle-free. I prefer 11-inch ties—they're long enough for most applications and can handle the weight of even bulkier fixtures.
Historical Context: How Did People Start Seeds Before Grow Lights?
Before modern grow lights, gardeners relied on natural light and ingenuity. Indoor seed starting dates back to the early 19th century, when people used south-facing windows and heated greenhouses. Glass cloches and hotbeds—a frame covered with glass placed over decomposing manure—provided heat and light for germination. These methods worked well but required far more effort than setting up an indoor rack.In the Victorian era, “Wardian cases,” the precursors to terrariums, allowed gardeners to grow and transport plants indoors. The cases trapped moisture and warmth, creating an ideal microclimate for seedlings. While these methods were effective, they highlight how much simpler grow lights have made the process.
Additional Tips & Tricks
- Timers: Invest in a timer to automate your light schedule. Most seedlings thrive with 12-16 hours of light daily.
- Color Temperature: If you’re buying shop lights, look for a color temperature of 5000-6500K. This range mimics natural daylight and ensures optimal growth.
- Humidity Domes: For added warmth and moisture, use clear plastic domes over your seed trays. Pair this with the heat from shop lights, and you’ll see faster germination.
- Backup Power: If you’re in an area prone to outages, consider a battery backup or portable solar generator to keep your lights running.
Final Thoughts
The bottom line is that you don’t need to spend a fortune to start seeds successfully. Full-spectrum shop lights do the job just as well as specialty grow lights in most cases. For those looking to save even more, check out thrift stores or clearance sections at hardware stores for inexpensive fixtures. The key is experimentation—find what works best for your setup and your plants.If you have any tips or historical insights on seed starting, feel free to share them below. Let’s keep the conversation going!